BIM mapping in Reduzer
ꕥ
MORE CONTENT COMING SOON
IMPORTANT
ꕥ more video tutorails coming soon ꕥ
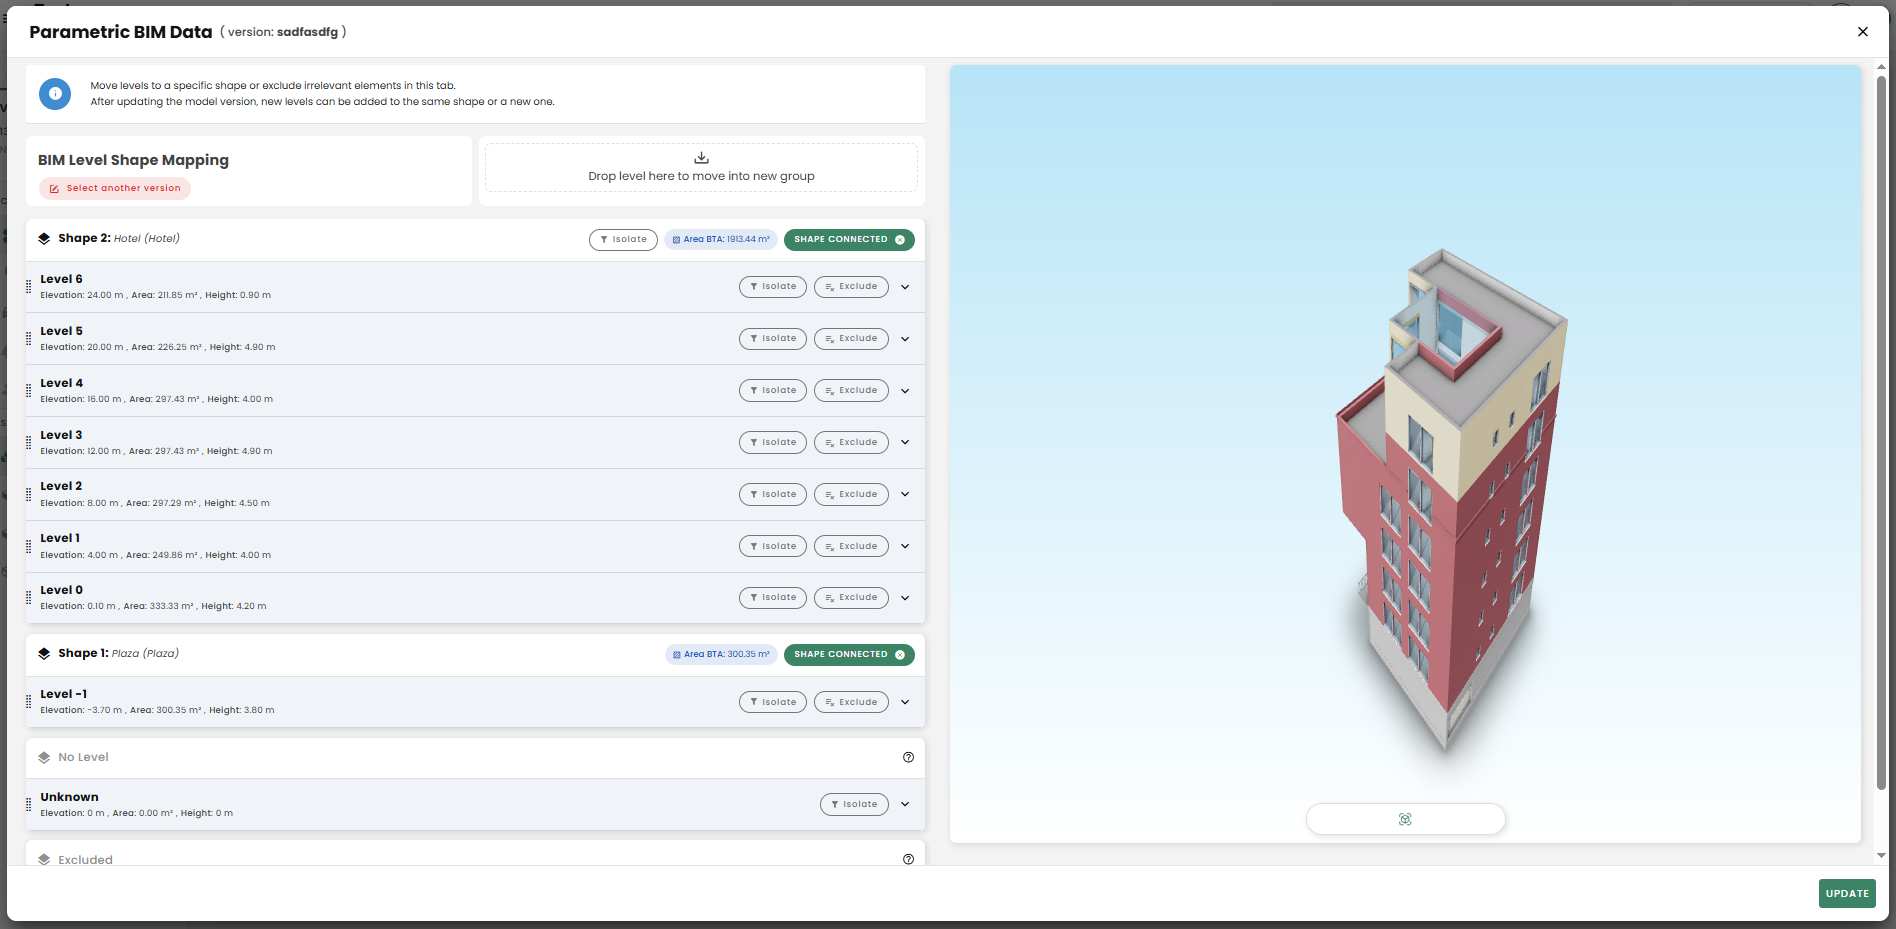
The BIM Mapping feature is the core tool for integrating your BIM model with the Reduzer platform for Life Cycle Assessment (LCA).
BIM in Reduzer
The BIM Mapping feature allows you to link the elements from your BIM model (imported via Speckle or IFC) to the environmental data in Reduzer’s component library.
Key functionalities:
Data Synchronization
Automatically pulls component and quantity data from your 3D model.
Unit-Based Mapping
Allows you to map elements (like slabs, beams, and doors) based on the unit best suited for calculation (e.g., area for >slabs, length for beams). This ensures accurate quantity transfer for the LCA.
Carbon Calculation
Once mapped, the feature translates the physical components of your building into a complete carbon footprint calculation, >helping you get instant feedback on the environmental impact of your design choices.
🍀 TIP
To ensure a successful and complete mapping, it is essential to follow the specific IFC export guidelines provided in the BIM section of our Academy page.
Mapping Process
IMPORTANT
ꕥ soon: video on general mapping process - step by step guide ꕥ
BIM mapping explained
A step by step tutorial video where you can learn how to map your BIM model once you uploaded it in Reduzer.
How to choose Units
Choosing the correct unit is the most critical step in successful BIM mapping:
Unit Dictates Visibility
The components you see in the Import Components tab are entirely dependent on the unit you select to map by.
Match Unit to Element
You must choose the unit that is most appropriate for the element you are mapping to ensure an accurate transfer of quantities for the Life Cycle Assessment (LCA).
Area or Volume are best for elements like slabs, walls, or insulation.
Length is most effective for linear elements like beams, pipes, or cables.
Amount (or Count) is typically used for items like doors or windows.
IMPORTANT
ꕥ soon: GIF showing unit choice ꕥ
The Problem with Mismatched Units
If an element is impossible to map by the chosen unit (e.g., trying to map a beam by area), it will not be shown in the Import Components tab, leading to missing data in your calculation.
🍀 TIP
Always ensure the unit you select aligns perfectly with the physical nature of the element.
How to choose a Component
When working with BIM mapping, you are essentially choosing which item from the Reduzer library will represent the physical element (like a wall or floor) from your model.
Here is a simple guide on your options for choosing a component:
IMPORTANT
ꕥ soon: GIF showing component choice ꕥ
Map an Existing Component and adjust It.
Locate a component in the global library that closely resembles the one you need.
Map this component to the element from your BIM model.
After mapping, you can manually edit the component in the inventory list to adjust its properties, such as changing existing products or adding new materials to match your actual design specifications.
Unit is Key!
The options you see available for mapping are filtered by the unit chosen (Area, Volume, or Length), so ensure you select the unit best suited for the element (e.g., area for a wall).
How to create a Component
Create a Custom Component in Your Library
The quickest way is to create the component yourself in your "My components" or "Company" library. You can build it from scratch, or simply duplicate an existing component in the global library to use as a starting point.
IMPORTANT
ꕥ soon: GIF showing component creation ꕥ
Request a component be added (for the Global Library)
If the component is a generic one that should be available to all users, you can send a request to our support team with the EPD number (or use the dedicated request form).
IMPORTANT
ꕥ soon: GIF showing request button ꕥ
How to Map to a Product
The BIM mapping feature links the calculated quantities from your imported 3D model (via Speckle or IFC) to the specific environmental components in the Reduzer library.
IMPORTANT
ꕥ soon: GIF showing mapping of an element ꕥ
🍀 TIP
The most critical step is the initial Unit Selection, as the system first uses your chosen unit (Area, Volume, or Length) to filter which building elements from your model are available for linking to a product.
Step-by-Step Explanation for BIM Mapping
- Access the Mapping Tool
After uploading your model, go to your version's Material List.
Click the "Component BIM mapping" button (or similar control in the interface).
- Select the Measurement Unit
- Choose the unit that accurately represents the building element you are mapping (e.g., Area, Volume, or Length).
🍀 TIP
This selection determines which elements from your BIM model are visible and ready to be mapped. For instance, if you choose "Area," only elements with calculated area quantities (like floors or walls) will appear.
- Link to a Component
Select the BIM element you want to map.
Choose a corresponding component (or a product) from the library:
Option A (Custom): Link to a component you have already created in your "Company" or "My component" library.
Option B (Global): Link directly to an existing product in the Global Library, such as an EPD or a Reduzer average value.
- Adjust Component Details (If Necessary)
Reduzer primarily pulls quantities from the BIM model, not the material makeup (thickness/layers).
If you use a general or similar component from the Global Library, you can go into the inventory list and manually edit the component to change existing products or add new material layers to match your project's specifications.
- Add Multiple Components (Optional)
- You can link multiple components to a single element in your model (e.g., for complex layered assemblies) by using the "+ Map group" option.
How to Edit an Exisitng Mapping
To modify a mapping, you primarily work in the Material List of your version. Here, you can directly adjust the component's details—like materials, thickness, or quantities—or change the component it’s mapped to.
🍀 TIP
If a component was originally created using Automodel or BIM, you might need to manually unlink its internal settings to adjust them. Alternatively you can manually adjust pecentage of linked quantity to override initial value while preserving BIM link.
IMPORTANT
ꕥ soon: GIF showing how to change the link details ꕥ
Step-by-Step Guide: How to Edit an Existing BIM Mapping
Access the Material List: In your project, go into the desired Version and open the Material List.
Locate the Component: Scroll through your inventory to find the component you want to edit.
Modify Component Details:
To edit the internal composition of a component (e.g., change its products, layers, or thickness), select the component from the list.
If the component was initially created via an Automodel, you may need to use an "unlink" button within the component editor to detach the auto-generated values before making manual changes.
Save your changes to update the component in your version.
- Change Product Origin (for Renovation/Reuse):
To update the material's life cycle status (common in renovation projects), look for a "3 dots" or edit option next to the specific product in your inventory list.
You can change the Product Origin there (e.g., from “New” to "existing kept", "reused", or "existing waste").
How to Replace or Delete an Existing Mapping
To modify or remove an existing link between a BIM element and a component, you work directly within your version's Material List or via the BIM-IFC editor. You can either overwrite a mapping with a new component or remove the existing item.
Step-by-Step: How to Replace a Mapped Component
If you want to choose a different component for an already mapped building element, you need to re-enter the mapping tool:
Go to the Material List: Navigate to the version you want to edit and open its Material List.
Access BIM Mapping: Click the "Component BIM mapping" button (or similar option) within the Material List.
Find the Element: Locate the specific building element (e.g., "Wall External," "Floor") that has the existing component mapped to it.
Select New Component: Choose a new component from your Global, Company, or My Components library to link it to the building element. The new component will immediately overwrite the previous mapping for that element.
Step-by-Step: How to Delete a Component, BIM mapping, or Version
Option 1: Delete a Single Component/Product from the Inventory:
If you want to remove a specific product or component from your version's list:
Go to the Material List: Navigate to your project version and access the Material List.
Locate the Item: Find the component or product you wish to delete.
Delete: Use the "3 dots" or edit option next to the item to access the delete function, or use a trash icon if available, to remove it from the inventory.
Option 2: Delete an Uploaded BIM/IFC File:
If you have uploaded an IFC file to the project that you want to remove entirely:
- Open BIM Editor: Once inside your project, look for the BIM-IFC editor available in the sidebar (usually an icon in the upper part of the sidebar).
- Select and Delete File: Click on the file icon representing the uploaded BIM/IFC model and choose the delete option.
Option 3: Delete an entire Version:
If you want to remove the whole version (including all its mapping and calculations):
- Go to the Main Project Page: Navigate to the project dashboard where you see all your versions listed.
- Delete Permanently: Use the three-dot action menu on the version tile and select delete permanently.
Multi Select & Groupings
IMPORTANT
ꕥ soon: video on general mapping process - step by step guide ꕥ
BIM mapping explained
A step by step tutorial video where you can learn how to map your BIM model once you uploaded it in Reduzer.
How to Multi select and when
Multi-select and Bulk Mapping allow you to map or edit multiple building elements simultaneously, greatly speeding up the mapping process. You use this when multiple elements in your model (like all your outer walls, or a group of similar beams) share the same component composition and need to be linked to the same component/EPD.
Step-by-Step: How to Use Multi-Select (Bulk Mapping)
Access the Mapping Tool: Go to your version's Material List and click the "Component BIM mapping" button.
Select the Measurement Unit: Choose the appropriate measurement unit (Area, Volume, or Length) to view the elements grouped by that quantity.
Select Multiple Elements: Within the list of unmapped building elements, hold down the Shift or Ctrl key (or Command on Mac) to select multiple entries that should be linked to the same final component.
Assign the Component: Once multiple items are selected, choose a component from the global, company, or personal library. The system will assign that single component to all selected elements simultaneously.
🍀 TIP
If you have walls with the same buildup but different types, you can create a "custom group" of those elements in your BIM software and map that entire group at once.
Note:
Bulk editing for products/materials works best when the items share the same unit, especially kg or m³ (kilograms or cubic meters). If the products use area (m²) as a unit, they must also have the same thickness to be edited in bulk due to current system limitations.
How to use the search feature
IMPORTANT
ꕥ soon: this section will be soon updated ꕥ
How to Create Groups and Map them
IMPORTANT
ꕥ soon: this section will be soon updated ꕥ
How to Edit Exsiting Groups
IMPORTANT
ꕥ soon: this section will be soon updated ꕥ
Component ID
IMPORTANT
ꕥ soon: this section will be soon updated ꕥ
BIM mapping explained
A step by step tutorial video where you can learn how to map your BIM model once you uploaded it in Reduzer.
How to use it only withing reduzer & Choosing Main parameters
IMPORTANT
ꕥ soon: this section will be soon updated ꕥ
How to Download a template and find Component ID(explain that is maps to the unit of the component)
IMPORTANT
ꕥ soon: this section will be soon updated ꕥ
How to Finish creating an excel file and Importing it
IMPORTANT
ꕥ soon: this section will be soon updated ꕥ